App Setup Guide – Contact Forms App
Installation Steps
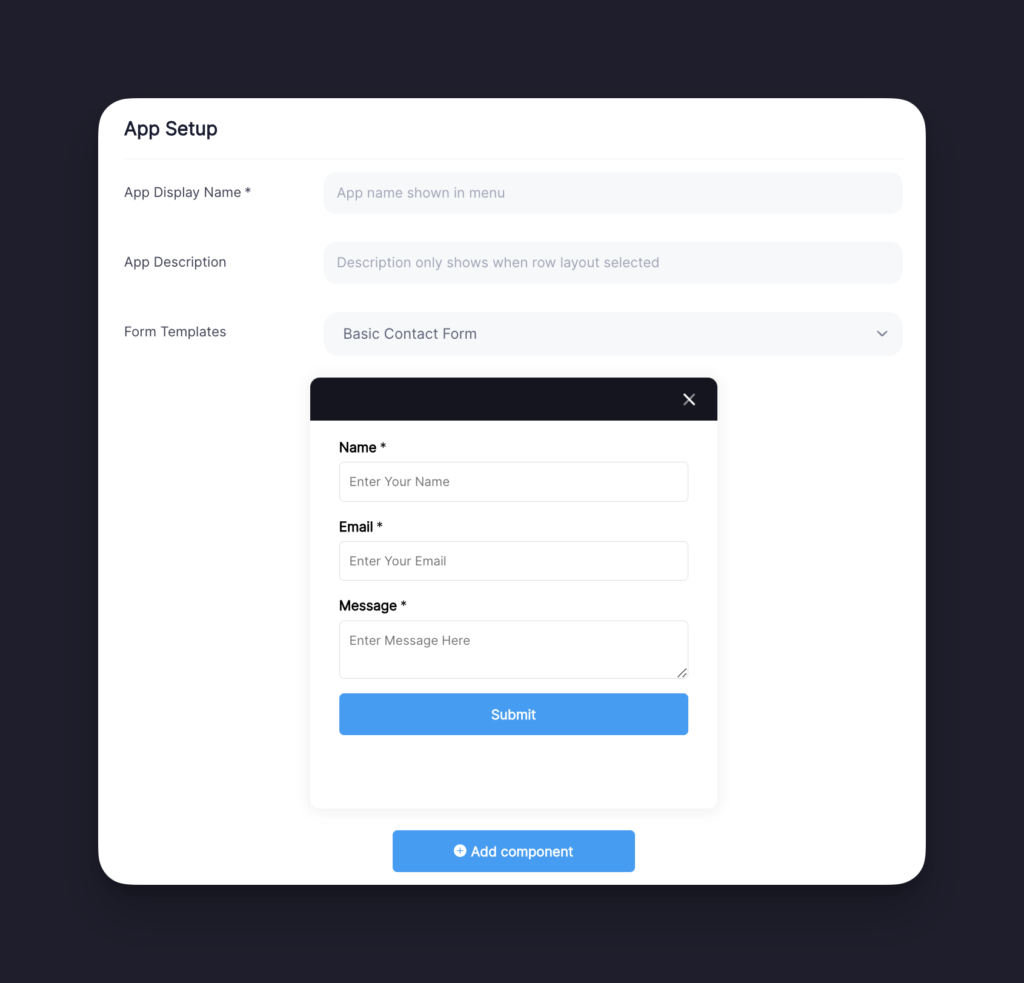
Step 1
Choose a name for the app. If you have selected a Row or Column layout for your button’s menu, this name will be displayed near the app icon.
Note: You can see how your chosen app name will look for a specific layout by clicking on the ‘Columns’, ‘Rows’ or ‘Icons Only’ tabs found in the App Icon Design window on the right side of the screen.
Step 2
Write a short description to give website visitors a little bit more information about what the app does. Please note that the description is only shown in your menu if you have chosen the Row Layout for your button.
Step 3
Click the Form Templates dropdown menu and choose from one of the 4 available options.
Note: We hope to add more templates in the near future. If there is a specific field type that you need, please contact us at support@contactbutton.com or via the Contact Button in your dashboard.
Step 4
Once a template is selected, a sample form will appear. You can modify any of the fields in the form by hovering over the field and clicking on one of the three green icons.
– The three horizontal line icon allows you to change the order of the field in the form.
– The pencil icon allows you to edit the text that is displayed.
– The bin icon allow you to delete the field from the form.

Step 5
If you want to add additional fields to your form, simply click the ‘Add component’ button found on the bottom of the Contact Form builder.
Select from any of the 5 components to add them to your form.

Step 6
If you want to provide a little more context about the form to your website visitors, you can add that in the Form Header Text field.
Step 7
At this time, the only way we handle Contact Form submission is by emailing the submission directly to you.
Note: While we do store the Contact Details of anyone who submitted a form, we do not currently keep anything in our database other than Name/Email/Phone data. So any message data that is sent will only be available in the email we send to you.
Step 8
In the ‘Success message title’ & ‘Success message text’ fields, you can modify the message that is displayed to a user after they submit their email address via the app. If you don’t change anything, we will simply display the default messages.
Step 9
Complete the “Icon Design” and “Display Options” sections and click Save.
Note: If this is the first app you’re setting up and it’s unclear what to do in these two sections, please visit our guide titled “How to Create and App“.